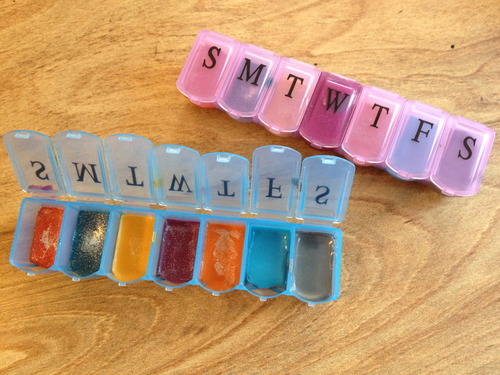
Make lipstick with crayons
Things You'll Need
3 nontoxic crayons (your choice of color)
1 100 percent pure beeswax candle (no added color, 1-inch diameter)
3 tbsp. oil (mineral oil, baby oil, soy oil, coconut oil, etc.)
Resealable plastic bag
Hammer
Heat-resistant cup
Saucepan
Small container with a lid or an empty lipstick tube
Instructions
1. Remove the paper labels off the crayons, and place them in a resealable plastic bag.
2. Break up the crayons into smaller pieces with a hammer.
3. Put the crayon pieces, oil and a 1-inch segment of candle in a heat-resistant cup. Place the cup in a saucepan on the stove.
4. Fill the saucepan with enough water to reach about an inch up the side of the cup.
5. Heat the contents of the pan on a low temperature setting, stirring occasionally, until the ingredients in the cup melt together.
6. Remove from heat and take the cup out of the pan. Allow the contents to cool slightly--about one to three minutes.
7. Pour the mixture into a small container or an empty lipstick tube while still warm.
8. Allow the lipstick to cool completely (uncovered). Cover or close the container.

Make lipstick with crayons
Basic Ingredients:
- Petroleum jelly (Vaseline)
- A crayon, any colour you like
Optional ingredients:
-Vitamin E oil/gel cap
Tools:
-Small travel jars (can be purchased at a dollar store) or empty makeup containers to store your lipstick
-Small knife
-Spoon
-Microwaveable bowl, preferably ceramic or glass
-Microwave
-Oven mitts
-Stirring stick
Instructions: 1. Remove the paper from the crayon, then using your knife, cut the crayon in half and put one half away.
2. Finely chop the crayon, and place the bits into the bowl.
3. Spoon out 1 teaspoon of petroleum jelly into the bowl, then mix it with the bits of crayon. Optional: Add a few drops of Vitamin E oil or use the knife to cut a slit into the gel cap and squeeze the oil in. This will provide extra softness and shine.
4. Put the mixture into the microwave for 3 minutes or until it is melted. Carefully take the bowl out with your oven mitts on; the bowl will be hot!
5. Act fast, or the mixture will harden! Take your stirring stick and mix well, then spoon the liquid lipstick into your container. Wait a few seconds until the mixture hardens, then apply your new lipstick! Tip: you may need to rub your lips together a couple more times than with store-bought lipstick to evenly disperse the product.

Make lipstick with crayons
Basic Ingredients:
- Shea butter
-Castor oil (if you don’t have castor oil, choose another carrier oil)
- A crayon, any colour you like
Tools:
Refer to the above recipe.
Instructions:
Refer to the above recipe, but for step 3, instead of petroleum jelly and Vitamin E oil, spoon out a ½ tablespoon of Shea butter and a ½ tablespoon of castor oil into the bowl, then mix it with the bits of crayon.

Make Eye Shadow Using Crayons
Things You'll Need
Mortar and pestle
Sealable plastic bag
Wooden mallet or rolling pin
Miniature herb grinder
Clean, dry towel
Several small bowls
Powder binder
Spoon
Old eye shadow tray or small container
Instructions
1. Purchase the nontoxic color crayons you want to use. Grind each individual color down in a mortar and pestle. You can also put the crayons in a sealable plastic bag and pound them with a wooden mallet or crush them with a rolling pin.
2. Pour the ground crayon into the miniature herb grinder to reduce the grounds into a fine powder. Put the powder into a bowl. Grind one color at a time, and put the powder into separate bowls. Make sure to wipe the grinder down after each use with a clean, dry towel.
3. Experiment with different color combinations by mixing small amounts of ground powder into the grinder. Once you have the desired shade, inspect the mixture for any color streaks. Continue grinding the mixture until streaks disappear.
4. Pour the mixture into a clean bowl, and spray it with powder binder. Use a spoon to mix the binder until you have formed a paste.
5. Press the mixture into an old eye shadow tray or other small container using the back of a spoon. Allow the eye shadow to dry before using it.
This comment has been removed by a blog administrator.
ReplyDelete